Wednesday, August 21, 2013

Getting the lead out

Decent weather has continued for us, and as a result I have been putting in lots of hours on the boat.  I finished up the centerboard installation, and got the pivot pin in place and properly seated.  I fashioned and installed keepers on both sides of the keel to keep the pivot pin from sliding.  In the photo below, the keeper can be seen in the keel, with the centerboard showing below the keel.

Bronze pivot pin "keeper" bedded and screwed into keel.


I began some painting, finally.  After five coats of varnish on the brightwork (two more to go, later on,) I put a coat of primer and then a coat of white on all the decks and both hatch covers.  I plan to do one more coat on the decks, and I may add some non-slip grit to that coat.  The Dynel fabric under the paint still has some texture, but the non-stick additive can't hurt, I guess.


Here's what 5 coats of varnish and a coat of deck primer look like.
The fan helps get the morning dew off the deck prior to painting.
I finally reached the point of the project (and more important the point of financial liquidity) where I could send the keel ballast off for casting.  I boxed up the ballast pattern in 1/4 inch plywood for shipment to the I. Broomfield and Son foundry in Providence, Rhode Island.  There are very few places in the US that do lead casting anymore, and Broomfield specializes in sailboat keels, so they were my choice by default.  Fortunately for me, the length of the packed-up pattern was exactly 108 inches, which just happens to be the exact maximum length package that you can ship via UPS. One inch longer, and I would have to have used UPS freight, and the shipping price would have quadrupled. I have to believe that Iain Oughtred knew this when he designed Grey Seal. Alternatively, consider that the package was headed to Providence.  Maybe someone else is involved?


Keel pattern on its way to UPS for shipment to Rhode Island
I took a couple of rainy days to finish up the rudder.  With the help of the folks at Classic Marine in the UK (who actually have patterns for Grey Seal hardware) and my faithful Grey Seal building colleague in Melbourne (Aussie Andrew) I managed to identify the various bits which comprise the pintles and gudgeons and placed an order.  There was a bit of global back-and-forth required when I decided to also order the mast hinge, since the cost of intercontinental shipping is almost as breathtaking as the cost of the hardware itself!  At any rate, I am hopefully awaiting the manufacture and delivery of "the right stuff."

I drilled out the rudder for silica bronze rod drifts to hold its planks together, hacked barbs into the rods, and hammered them into place.  This rudder will not come apart anytime soon.


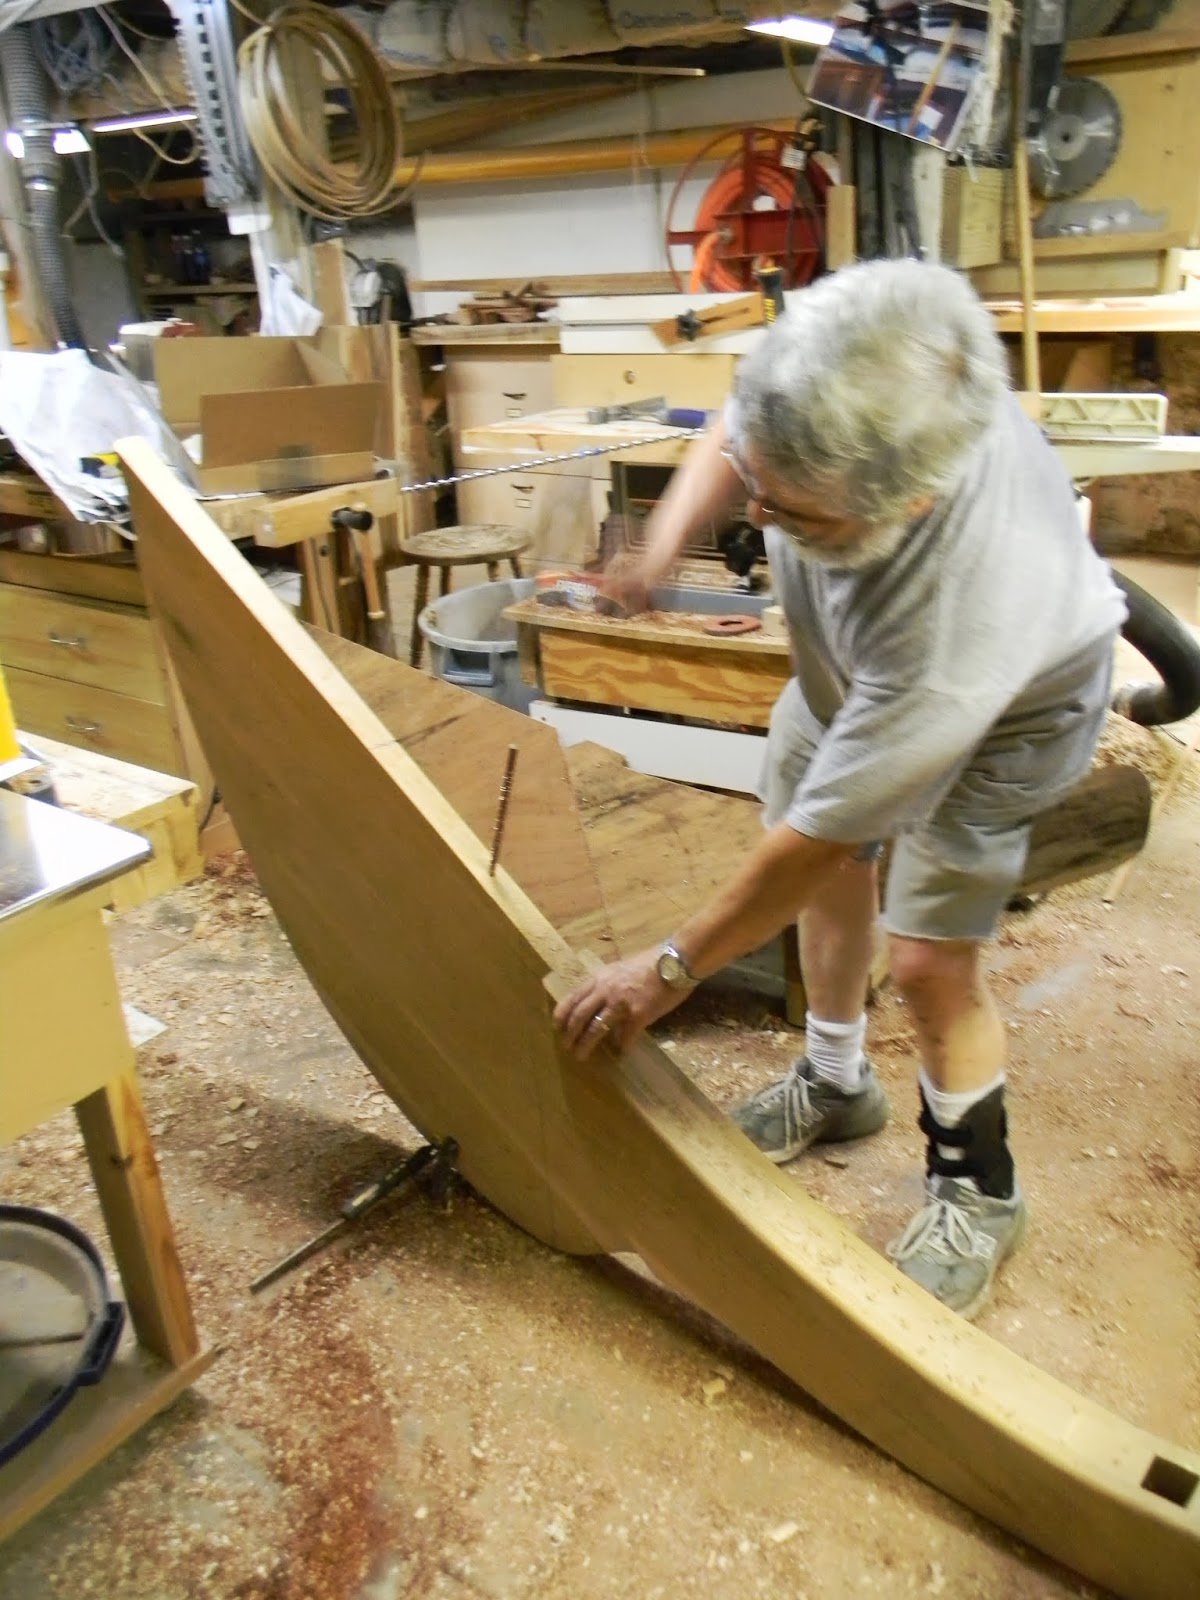
Geezer hammering drift into rudder.
I also fastened the cheeks to the blade using 1/4 inch copper rods to make rivets.  This may be a bit of overkill, but it does look very salty and traditional.


Seven rivets hold the cheeks to the blade.


Closeup of a finished rivet
With the centerboard in place, I started to construct the centerboard trunk cap assembly.  The first part runs atop the keel, covering the slot where it is fully below the waterline.  I used a 1 inch by 5 inch piece of Douglas fir, and epoxied and screwed it in place.  I want no leakage here.  Of course it means that the board will never come out through the cabin again, but that is a necessary compromise in favor of watertightness, I think.

The visible (above the cabin sole) sections of the trunk cap were more complicated.  I used 1 inch African mahogany.  The complication is that I decided to mount the centerboard lifting winch on the diagonal section of the cap.  Iain has it aft of the bulkhead, atop the engine, but I thought this would be a problem for engine access, and a twisted ankle hazard on deck.  I ran 4 5/16 inch stainless carriage bolts upward through the mahogany, and mounted the winch (actually a low end trailer winch) on them.  Because part of this section is below the waterline, I plan to bolt the section in place with 3 inch silicon bronze machine bolts going through the cap, and through the 1 x 1 1/2 inch trim on  the sides of the trunk.  I will use bedding instead of epoxy, because I do want to be able to remove this piece if needed.


The winch in place on the centerboard trunk cap
All three parts of the trunk cap assembly.
The cable running off the winch will roll over two sheaves which I pinned into the top section of the trunk, and down through a 1 1/4 inch hole to link to a shackle attached to the centerboard.  When the silicon bronze 3 inch bolts arrive, I'll put the whole thing together and see if it works.

No comments:

Post a Comment