Friday, November 8, 2013

Moving Day

Last Tuesday was moving day.  We picked up the new trailer and brought it home.  Loading was surprisingly easy.  I positioned my homemade gantry about 1/3 of the way from the bow, and ran a strap under the boat and to a chain hoist on each end of the gantry cross beam.  Then, I jacked up and blocked the stern so it would be high enough to fit above the center bunk of the trailer. My wife and I raised the bow using the chain hoists in tandem. Then I cut up my trusty building frame and moved the pieces out of the way. The trailer was easy enough to back under the boat all the way to the stern. The side bunks needed a good deal of adjustment to securely fit to the hull sides, but that was fairly easily accomplished with the boat securely resting on the center bunk and held steady by the sling.  Everything went as planned, except we forgot to take pictures!  Sorry.

Here's me attaching the trailer hitch to my truck.  Boatbuilding is a lot more fun.
Once loaded up, we began the white knuckle drive to the Philadelphia riverfront, where the Independence Seaport Museum is located.  The folks at the Museum are graciously allowing me, as a long time volunteer, to do some of my remaining heavy work in the Museum boatship, "Workshop on the Water."  

Here we are arriving at the Independence Seaport Museum in Philadelphia

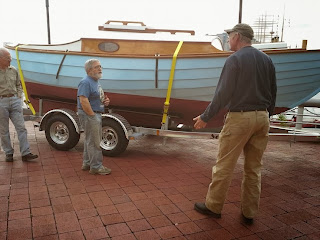
Shop volunteer Steve, shop director Jeff, and I plan our next step.
Moving the boat into the shop was easy.  Jeff clamped a trailer ball to a tine on the fork lift, and pushed the trailer into the shop.  There she was lifted off the trailer by two rolling gantries, which were then pushed into her  her space on the shop floor.  Once there, she was lowered onto blocks and supported on the sides by four jack stands.

The shop floor is cleared to make room to maneuver.

In place beside a restored 1928 Ventnor runabout
The first project is the installation of the ballast.  The idea was to maneuver the ballast under the boat on wheeled dollies and raise it into position using two floor jacks.  This went pretty well, and the fit was remarkably close.  As predicted by the foundry, shrinkage of the lead was minimal.  A 3/8 inch shim at the forward end will be sufficient.  There was some roughness inside the centerboard slot that needed to be cleaned up, but that was easy with a coarse rasp.

The ballast being jacked into position on the keel.  The centerboard slot fit pretty well. 
The only problem was a slight warping at one end of the ballast.  We suspect this is the result of the ballast resting on a skid on its side for the trip down from Rhode Island.  Jeff (who knows about all this stuff) thinks we can clamp the ballast in place against the keel and that we can apply enough clamping pressure to eliminate the warp.  We shall see about that next week.

No comments:

Post a Comment