Sunday, April 29, 2012

Housekeeping

With the hull right side up, I needed to spend a bit of time getting ready for the work to come.  While the boat was still outside, I had a chance to really examine the fairness of the strakes on both sides of the hull.  Actually, this was the first time I was able to see the starboard side from a distance of more than 18 inches or so.  It didn't look too bad, although I did fix a few bumps and dips with a rabbet plane and thickened epoxy respectively.

The next task was to brace the hull.  I built six padded supports, three for each side, which I screwed to the rolling cradle to hold the hull in position.
Padded supports holding hull. I'm in "king of the world" mode.
Next, I removed the remaining three molds, and finally got to see the entire open space.  A 22 foot hull with an 8 foot beam is amazingly large when it's wide open.  Now, it's my job to fill it up with appropriately placed pieces of wood.  

Speaking of pieces of wood, I took the opportunity to break up and toss my trusty molds.  That really hurt, but based on the number of Grey Seals being built in the world these days, my likelihood of finding someone close by who wants my molds seemed remote.  Anyway, the pile of oddly shaped plywood probably gave the trash collectors, and my neighbors, something to think about.
The molds go to the curb.  Guess what Bosco's about to do.
After a good sweeping of the garage floor, I hooked up my comealong to a big screw eye in the garage sill and pulled the roller carriage (boat included) into the garage.  Then, I rebuilt the shed. 
Back home in the garage, shed rebuilt, thwarts in place.
Because the molds are all gone and no bulkheads are in place yet, the hull tends to spread.  To prevent that, I installed thwarts at stations 3, 5, and 7.  They are just 2x4s with cleats that hook over the sheer strake.  Their lengths are based on the beam shown on the plan for each of the three locations.

The final preparatory step was leveling and plumbing the hull.  The best way to do that is to use spirit levels on the side and top of the centerboard case, because I know that it is plumb with the keel, and level with the DWL. 
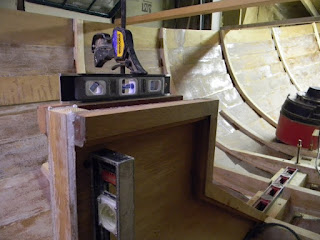
Leveling the hull
 The next step is to cut the frames to 2 inches below the sheer in preparation for the fabrication of the sheer clamp.

No comments:

Post a Comment