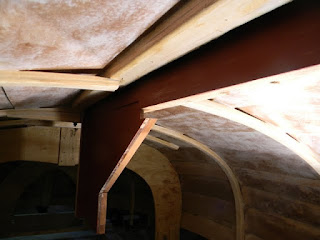
First installed was the much discussed and debated head ledge at the aft end of the case, notched to abut the forward edge, and rest atop frame 6. Fortuitously, I happened to be at the ISM boatshop the day before, and observed my buddy Newt (no, not that one) applying bottom paint to the inner surfaces of the case to be installed in the Charles Beetle whaleboat being built there. Usually, we forget to paint the inside of the case until it is assembled, and then we struggle with a skinny roller on a long handle. Doing it first is a much easier and cleaner approach, and I was lucky to get a timely reminder of that.
 | |
| Head Ledge, prepainted, glued in place |
 |
| A better view of the notch, ready to accept case sides |
Gluing up the sides was pretty easy, since I had test fitted them many times, predrilled them, and anguished over the entire process. To my way of thinking, few things could be more frustrating that finding that your 300+ pound steel centerboard does not slide freely in the case after the whole affair is assembled permanently.
 |
| Starboard side of case glued and screwed to keel and head ledge |
 |
| Both case sides glued and screwed in place |
 |
| Moulding trim on case sides will hopefully be finished bright |
Hello Charles,
ReplyDeleteVery clever and neat work on the centre case. My plans arrived a couple of weeks ago so I hope I will remember how you did that if and when I get to the same stage. Need to get my head around the lofting process first.
Well done.
Cheers
Kaimai6
Hi Kaimai6, excuse me for butting in. I'm also building a Grey Seal in Australia but I'm only up to hjaving the frames/moulds done. The lofting is actually pretty easy for this boat cos you only have to do about half of a full lofting. By this I mean the body lines, for and aft stems, then a couple of other things like the rudder profile, cabin sides etc. Its great to have another in the GS club, feel free to ask questions. By the way where are you?
ReplyDeleteRegards Andrew
P.S. Charles what other plans have you got while you have the hull upside down - I'm warming to the idea, ha ha
Hello Andrew, Thanks for that. I figured that the moulds could be scaled up by four off the body plan but I wasn't sure about the keel etc.Bit of a new experience for me, lofting, as previous boats I have built have all had fullsize frame drawings and copious instructions.Iain certainly hasn't gone overboard with the instructions however I have bought his book as well as John Brooks's one, the latter in particular is brilliant. Grey Seal will be my most ambitious boat building project so far.
DeleteMy wife and I have a small drystock farm about 25k out of Tauranga in the Kaimai ranges. Hence the non de plume. Kaimai is a Maori word and I think it means "food for the people"
Regards Kaimai6
Hi Kaimai6,
ReplyDeleteThanks for the kind words, and welcome aboard. You are joining a small but committed group of Grey Seal builders. Echoing Andrew's offer, I would be happy to help where needed. Advice is cheap, especially for the giver.
Charles
Hello Charles, Many thanks for your kind offer of advice. Hope you don't have cause to regret it because there are a few things in the plans that are somewhat confusing to me still but I guess if I start at the beginning and build my way through it it will all become clear in time.
DeleteCurrent project is a rocking chair which is not disimilar to a boat in that it hardly has a straight line in it. Interesting and challenging project though.
Cheers
Kaimai6
Hi Andrew,
ReplyDeleteGood to hear from you. Aside from finishing up the floors at 4 1/2 and 5 1/2, which I am completing tomorrow, I have a few more items on the upside-down list. These include: finishing the inside cleanup and sanding (I REALLY blooped a lot of epoxy,) drawing the waterline, applying a full coat of epoxy on the outside, bottom painting, putting a primer coat on the topside, and making a pattern for pouring the ballast. More on that in a forthcoming post. That will likely see me through until springtime, when the flip will most definitely happen.
Cheers.
Charles