Wednesday, October 12, 2011

Heavy Lifting

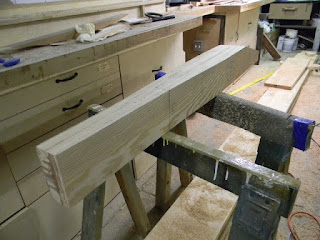
Last week I bought a pile of 16 foot 2 " by 12" clear douglas fir to construct the outer keel and deadwood.  The plan calls for 5 inch square lumber, and the longest single piece, the one with the centerboard slot in it, is a full 16 feet long.  I decided to tackle that one first, and made it by laminating 2 full length 2" x 5" boards along the outsides, and sandwiching two 1 1/8" x 5" boards between, leaving a space 58" long for the centerboard slot.  My new Yoda, Bruce Mackenzie at the Independence Seaport Museum, observes that boatbuilders are chronic underestimators, and that is how I explain my mistaken assumption that I could easily heft the glued up keel section out of the basement, into the garage, and onto the hull by myself.

I did get it in place, but not without a great deal more effort and back strain than I intended.  I pushed it out the basement window onto the driveway (a good dry run for moving the mast out of the basement sometime in the future) and set it on a mover's dolly to roll it back to the garage.  Lifting one end at a time, I got it onto the hull.  

The position is important here.  According to the plan, the bottom of the keel is supposed to be about about 3" farther from the waterline at the stern than it is where it begins its curve forward of the centerboard slot, so the long section, which will define the final contour of the keel needed to be set in place off-level before scribing.  

After scribing the curve of the hull onto the keel section, I lowered it onto a couple of sawhorses, and powerplaned down to the scribed line.  A band saw would have made the process a lot easier, but  feeding that big a board through the band saw alone would have been impossible.  Two trips between the hull and the sawhorses, and I had a pretty fair match.

I also shaped the taper at the forward and aft end using the power plane, and I will finalize that and blend it into the stem and stern after the keel is glued up and in place.
The 16 foot section of keel in place after shaping
The next step is a matter of filling in the spaces between the hull and that big keel section, and that is a matter of making templates, gluing up more douglas fir, cutting, planing, fitting, etc.
Glued up section for where keel joins to stem.
I had hoped to complete the keel and deadwood prior to rolling the hull out of the garage, but have had to change plans.  The height (depth) at the stern will simply not fit through the garage opening.  Good thing I noticed that now instead of after the glueup was completed!  I'll go ahead and make those sections, and wait until the boat is outside before attaching them.
Deadwood section to sit aft of lead ballast will go on later
I guess I have another week or two on the keel fabrication, and then I'll move on to applying a couple of coats of epoxy to the exterior of the hull, finding the waterline, and painting the bottom.  I still hope to get her turned over and put back into the garage before the snow flies.

1 comment:

  1. Nicely done! Envious that you are building a Grey Seal. Hope to do it myself one day.

    ReplyDelete