Wednesday, July 9, 2014

Sails Ho!

As he promised, Brad Linthicum and team finished up Lagniappe's two sails, and I picked them up last Wednesday evening. Thursday was spent installing the mainsail. The fit was absolutely perfect, which means that both Brad and I followed Iain Oughtred's drawings correctly. His workmanship was absolutely first rate and I am very pleased with the result. Little things like a perfect fit the first time still amaze me. There are so many opportunities to introduce error, and I am painfully aware of my own limitations as a boat builder. I guess my first reaction is to expect that something will be wrong, which makes it all the more joyful when everything goes right. My mantra is usually, "Keep your expectations low, and you will rarely be disappointed." I am definitely not disappointed in the sails.

Brad Linthicum takes my check, gives me my sails, and shakes my hand.  Assistant Mary Anne looks on.
I opted for a traditional installation, given the traditional lines of Grey Seal. The mainsail is lashed to the gaff. That was easily done on the shop floor by bring the gaff inside. The weather outside was rough -- 93 degrees and dog breath humidity -- so working in the air conditioned shop as much as possible was a definite plus.

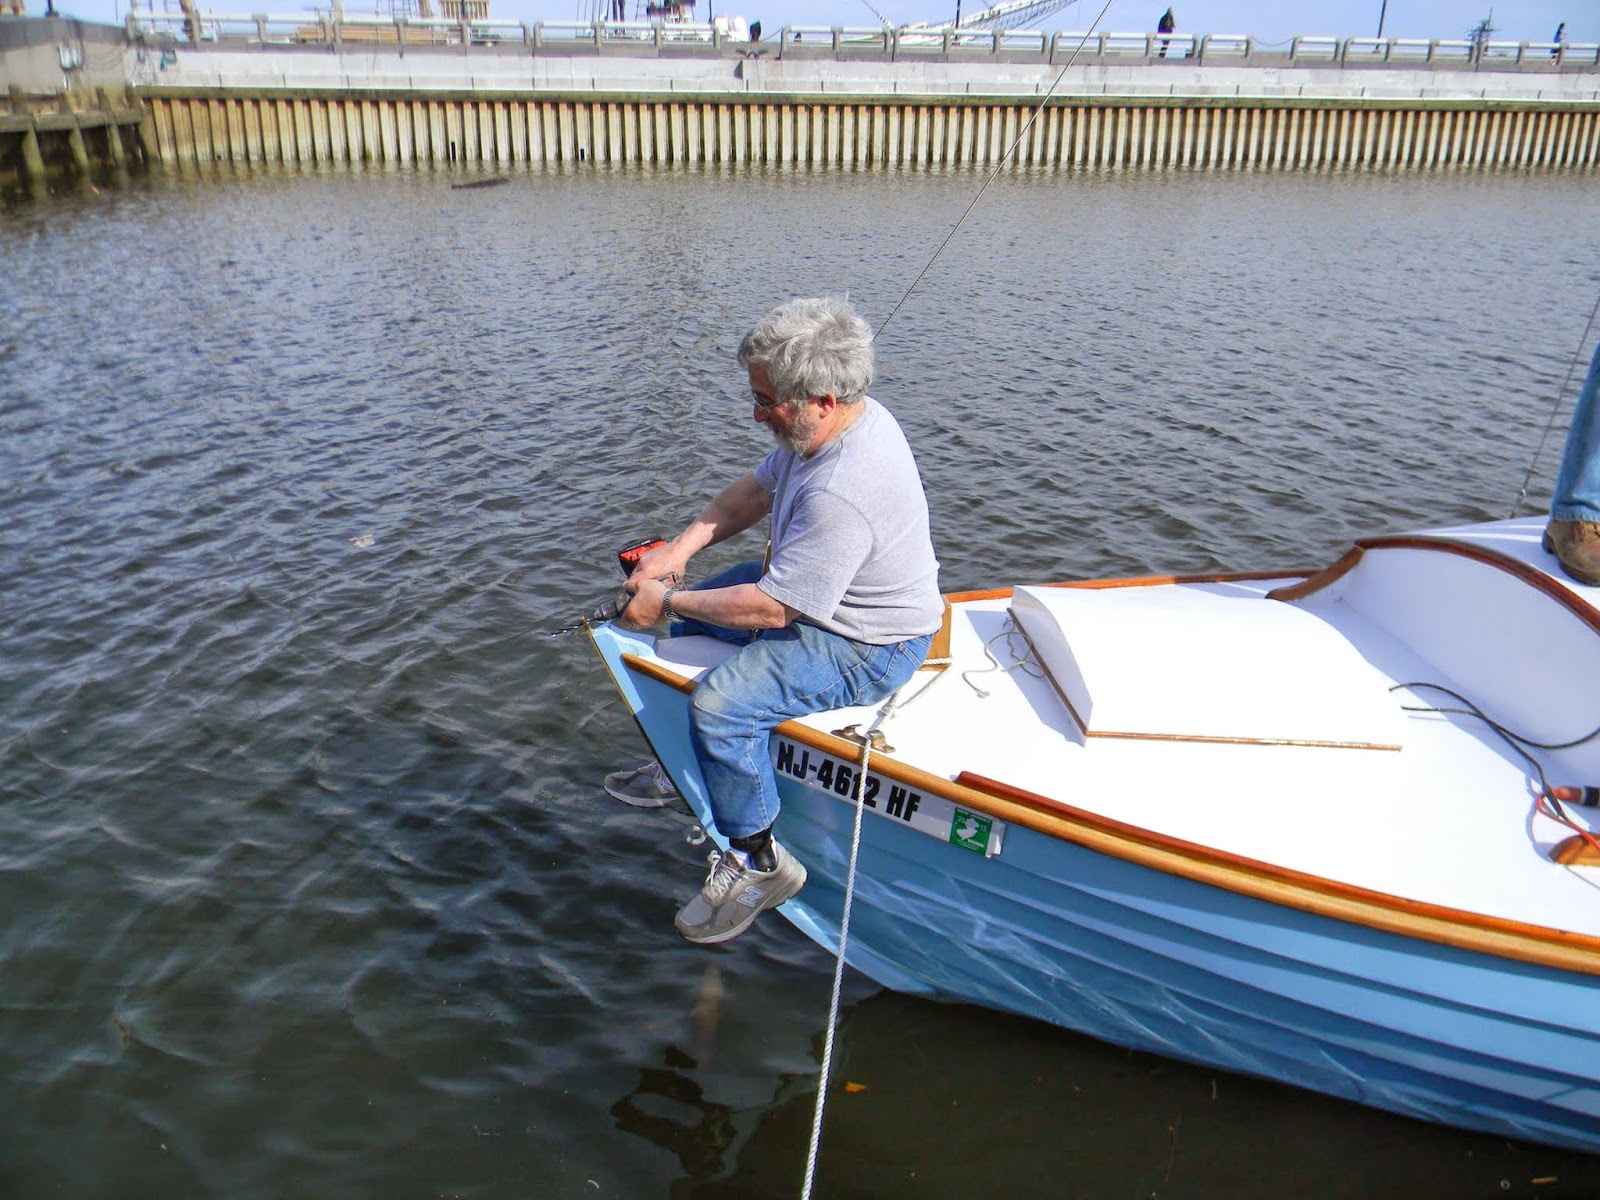
I used steam bent mast hoops to connect the mainsail to the mast. Tying the hoops to the grommets had to be done outside, of course. Dave Dormond, who is a first rate young wooden boat builder and is in charge of education programs at the Independence Seaport Museum's Workshop on the Water, gave me valuable advice and assistance with this. 

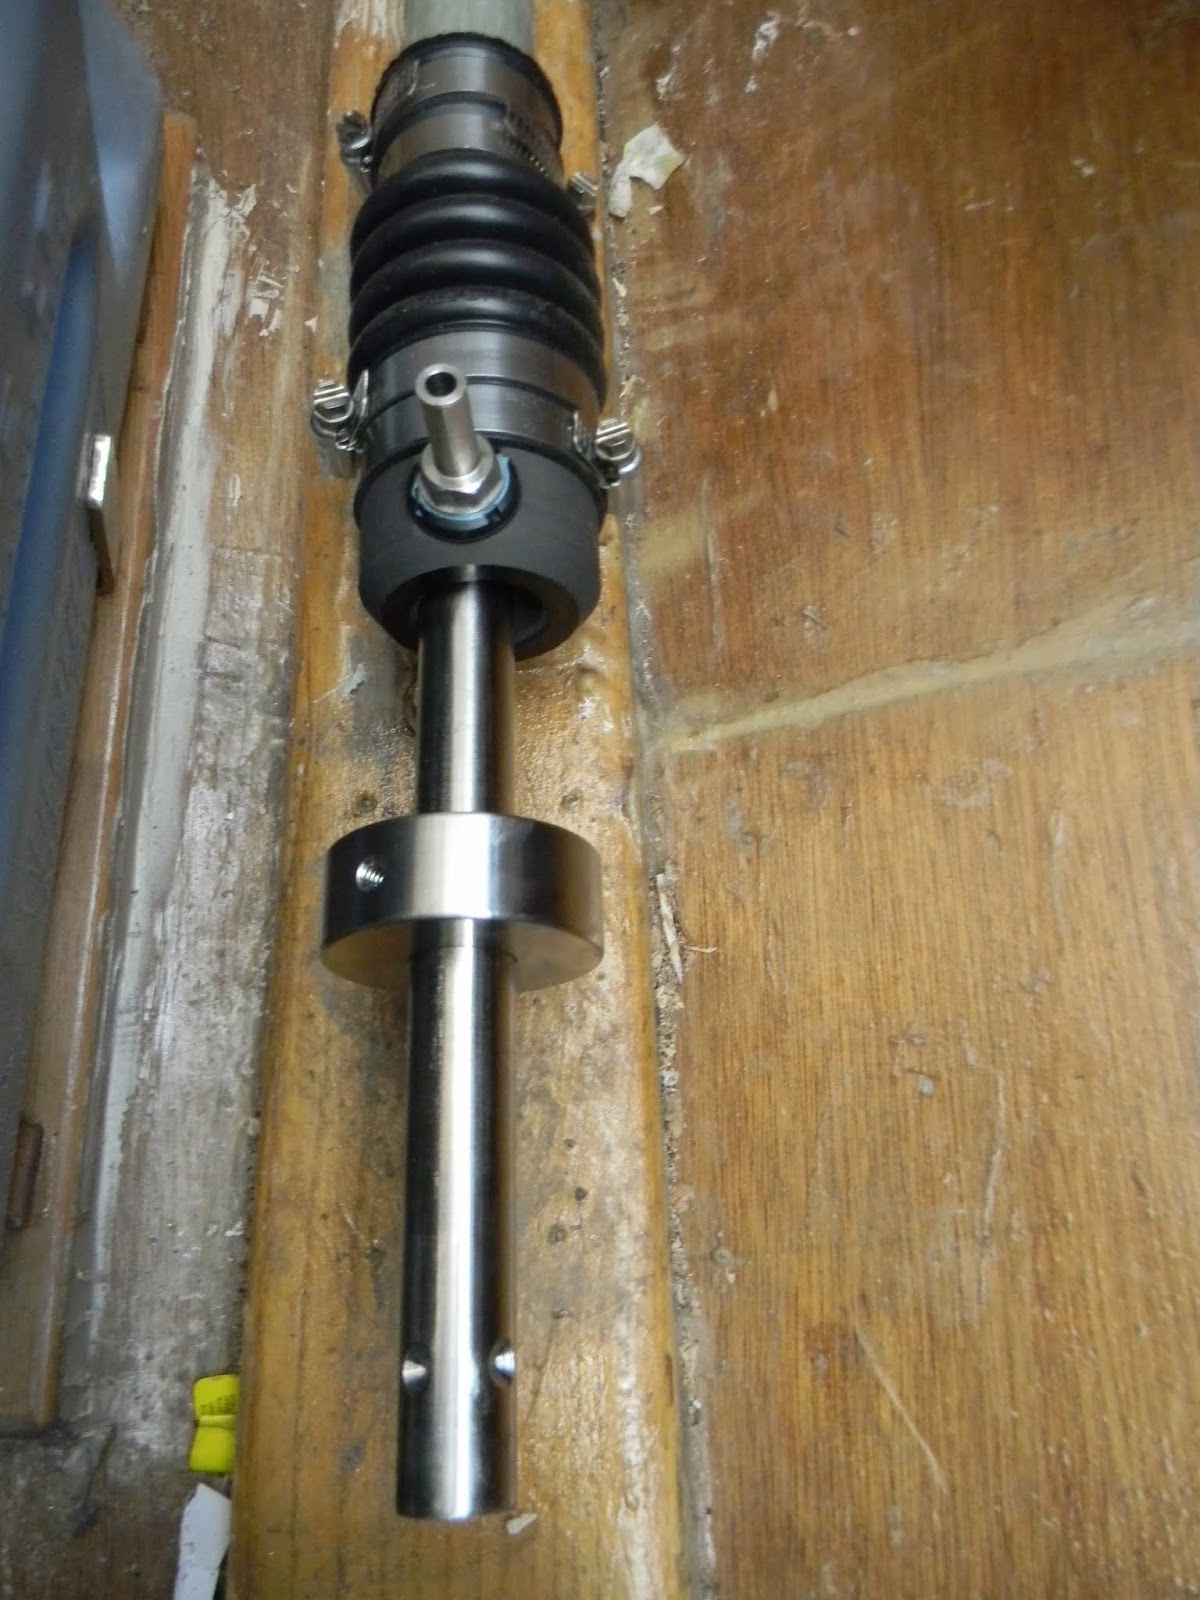
 The installation was trouble free. The peak and throat halyards worked fine, everything held together, and we were able to raise the mainsail for the first time.  When raising it, we noted a tendency for the mast hoops to rub on the forward side of the mast, making raising the sail a little more difficult. I resolved this problem by installing a light line along the forward edge, tied at the top to the gaff jaws and knotted to each mast hoop, holding the hoops horizontally rather than allowing them to droop. Effective solution, 15 minutes of effort.

The mainsail raised for the first time.
I still need to install an outhaul on the boom, which should be a simple proposition.  I also need to decide how to route the jib sheets back to the cockpit, but that is a job for another day.

View of mast hoops.  They don't droop anymore.

Monday, June 30, 2014

Rigging: Part II

I have been in a holding pattern for a couple of months now. All the rigging that can be done without sails has been done for a while now. I am somewhat excitedly awaiting the completion of the sails, and have been enjoying the oohs and aahs of people who walk by Lagniappe as she sits moored at the Independence Seaport Museum dock. We have been out for a few rides on the Delaware, under power of course. Otherwise, I have been in a maintenance mode -- another coat of varnish here, scrubbing the urban soot from the decks there, and so forth. We have also been chipping away at the cabin finishing. That is a slow and tedious job, especially in hot weather.

A few words about the rigging:  My colleagues at the Workshop on the Water, sailors all, strongly recommend that I run all halyards and sheets back to the cockpit. No point sending the mate forward unnecessarily, after all. So, with a few extra blocks, I ran the throat and peak halyards along the port side of the cabin top, and tied them off on a couple of homemade white oak cleats at the cockpit.


Mainsail halyards lead back to cockpit
I also took the advice of my more knowledgeable mates in selecting rope for specialized purposes. Where Iain specifies wire rope, except in the case of the shrouds and headstay, I am using a super-strong single braid polyester which is sold under the trade name of Dyneema or Spectra. It has about the same stretch as wire rope, you can use the same diameter for the same strength, and it is much easier to splice. Its main advantage is that it will not chafe the sails the way wire rope will.

The Dyneema bridle and peak halyard.
In addition to the bridle, I used Dyneema for the running backstays, and for the topping lift. All the halyards are 3/8 inch double braided dacron polyester.


Topping lift cleated to mast on port side, jib halyard through block on starboard side

I rigged the mainsheet using some antique blocks I rebuilt. I had intended to make my own blocks following a recent article in Woodenboat, but these are much cooler and rebuilding was a lot easier than making them from scratch. 


Strops, also Dyneema, hold mainsheet blocks.

Iain Oughtred's Grey Seal makes a pretty fine motorboat if you don't have sails yet. We have taken a few brief cruises on the Delaware River, seeing the sights, giving folks on the banks a chance to ogle, and generally feeling good about having built a boat. 


My son Andrew and his girlfriend Alysha visited at the end of May.
Motoring toward the USS New Jersey, a Missouri class battleship from WWII
Today was a big day. I visited the sail loft of Brad Linthicum, owner of Linthicum Sailmakers, in Sommerdale, New Jersey. Brad is making the sails for Lagniappe. I was delighted to find a well regarded sailmaker very close to home, especially one who does his own cutting and stitching. Surprisingly, (to me at least) local sailmakers increasingly send their work to China rather than make sails in their own lofts. I went over to take a few pictures, but while I was there Brad showed me what appears to be an error in the dimensions of the mainsail on the sail plan. The plan shows a mainsail luff of a bit over 22 feet, which is about 4 feet less than it really is. Good catch!


Brad and I study the sailplan in his loft. Abby is taking a break on the loft floor.


Brad Linthicum lays his batten along the edge of the jib-to-be


Cutting out reinforcements for the reefs
The sails are going to be dacron, but not a stark white. At Brad's suggestion, we went with an off-white fabric color called "Egyptian" which he prefers to use on traditional looking boats.  It looks great to me.

The jib and Abby on the floor,

No one works harder than a sailmaker's dog.

With a bit of luck, the sails will be done before the end of this week, and I can bend them on over the July 4th weekend. Is that a way to celebrate Independence day, or what?


Wednesday, April 16, 2014

Rigging: Part I

The euphoria accompanying our trip up the Delaware from Essington to Penn's Landing in central Philadelphia is well and truly behind now, and the serious business of turning the motor vessel Lagniappe into a living, breathing sailboat is underway. I am completely out of my depth with these tasks. I am, after all, a carpenter and not a sailor.  Therefore I am more than grateful to be able to lean on my friends and colleagues at the Independence Seaport Museum's Workshop on the Water. Between them, there is not a sailboat rigging subject on which a simple question cannot elicit multiple occasionally contradictory answers. The great thing is that all those answers are correct! As a novice sailboat rigger, it is nice to know that there really are many, many ways to skin this cat.

My first rigging task was the sizing and installation of the shrouds and headstay.  Jeff helped me set the mast in the hinge, and using dacron fishing line (minimal stretch) pre-fastened to the appropriate mast band, we determined the final length of each stay. We then brought the mast back into the shop, and swedged the top ends of each stay, using the fishing line as our measure.  

Shrouds and headstay taped to base of mast.


The upper end of stays swedged and fastened to mast ring with shackles.

Next, I made up the upper portion of the running backstays. The Oughtred plan calls for 7 x 19 wire rope for these, but it was strongly recommended by my advisory panel that I use low stretch polyester rope, the brand names Spectra and Dynema offering the best strength to diameter ratio. Actually, I found out that with either, you can safely go one size up and have at least equivalent strength to wire rope. The splicing is much easier, and the abrasion of the sails will be minimal.  I settled on Amsteel Blue 3/16" single braid Dyneema, which was available from Jamestown Distributors at a very reasonable price.  

I learned to splice single braid Dyneema from a really nice video I found on Youtube. I find that the Youtube videos are much easier for me to follow than diagrams in a book like Brion Toss's "The Complete Riggers Apprentice." The book is very informative, and fun to read, but when I sit down with a piece of rope and a fid, I am just confused without a Youtube video.


Dyneema eye-spliced running backstays  held in place by thumb cleats

You can see in the picture above that all halyard blocks have been fastened already, and that I ran a loop of lightweight rope through each of them and down to the base of the mast so I could rig the halyards from the deck by pulling them up with the lightweight rope.  The thought of going aloft in a boatswain's chair is at once charming and intimidating to my way of thinking. It will be avoided.

Ultimately, the mast became a jumble of wire, string, tape, and wood, and was ready for the attempted "final" stepping.

A long stretch of spaghetti
As you can see, I have decided to add a traditional touch by using steam bent white oak mast hoops to fasten the sail to the mast. These needed to be put in place before lines were attached and the mast was stepped for obvious reasons.  I think they look great.  I hope they work.

Finally, I assembled a crew of willing boatshop friends, and we carried the mast out to the boat on the dock. I had built a gin pole to lever the mast up using the headstay and a block and tackle ala the Grey Seal "Saturday Morning" as seen in this Youtube video.  However, because we were four big, burly, albeit elderly men, we decided to give it a go and raise the mast by brute strength alone.  Fortunately, things worked out.  We had a few oopses; the pin in the headstay turnbuckle was slightly too large for the hole I had drilled in the chainplate, for example.  This was soon fixed, and the mast was raised and fastened.

John and Larry hold the mast in place while I try to fasten the headstay.
Hmm. I thought that hole would be big enough.

The mast installation team: Larry, Jeff, John, and Joe.


Sunday, March 23, 2014

She floats!

It never fails to amaze me how many insurmountable problems and catastrophic eventualities can capture control of one's brain at 3  o'clock in the morning.  Fortunately, few if any of these thoughts are played out in the bright light of the following day.  That has been my life over the past week as we prepared for the launch of Lagniappe -- a few hours of uninterrupted sleep followed by a few hours of anxiety.  Will the engine start? Once it starts, will it keep running?  Will the high tech packless stuffing box  actually work? Will the epoxy crack and allow a seam to open up while trailering to the launch site? Will the ballast fall off? Will the travel lift fail and drop her on the ground? You name it, and I have worried over it during the past week. Fortunately, none of these anxieties played out in reality.  Almost everything worked as designed, and those things that didn't work were not major impediments.

We began the launch process on Thursday, by loading the world's newest Oughtred Grey Seal onto the trailer at the Workshop on the Water at the Independence Seaport Museum, which has been her home for the past three months.  Since Thursdays are a big volunteer day at WoW, lots of helpful hands were available to move things along.


Lagniappe suspended by WoW's two gantries.


A boy and his trailer
By the time I arrived with the trailer (carrying my spars) shop director Jeff Huffenberger and the crew had the boat off the ground and suspended in slings from two movable gantries. Slowly, she was maneuvered to the door and positioned to receive the trailer.


Ready for the trailer

A full crew, Jerry, Newt, John, and Robinson and me watch Lee work. 
Ready to roll
Once we got her outside, we tried to turn over the engine.  I have learned that diesel engines are great, and will run forever, very reliably and very efficiently, but first you have to get them started.  They are finicky about air in the fuel line, and in order to make them happy, you must purge the air by pumping fuel through the entire fuel delivery system.  This entails opening each hose, filter, etc. and pumping fuel until no more air comes out.  Then you close the fitting and move on to the next one.  This is a messy and slow job, but it paid off.  Jeff, who knows more about marine diesel engines than one ought to know, and I, who do not even know enough to be dangerous, carried out the process. Once we had finished, the engine did indeed turn over.  We ran her briefly, pumping water into the through hull fitting using a toilet plunger bell clamped to the end of a water hose (a very clever work-saving invention Jeff came up with on Thursday afternoon and I manufactured Thursday evening.) Someone simply presses the open end of the plunger bell over the through hull screen, you turn on the water, and crank the engine.


Dave, Robinson, and Lee hold the plunger bell in place on the through hull.
Friday morning, we hooked up and drove the trailer down the river to Butch's dock in Essington, PA.  We were Butch's first launch of the season, so starting the travel lift engine took a half can of ether.  Jeff sprayed while Butch cranked and I paced. 

We had hoped to put her in the water at low tide, and head back up river to the Museum dock where I'll rig her, but unfortunately Butch didn't have enough water until two hours past low tide. By then, it was mid-afternoon. We decided to put her in, check for leaks, tie up at Butch's for the night, and head up river at the following slack tide on Saturday.


Taking the straps off at Butch's
This will not do.


Butch gets ready to do his thing.

At 2 o'clock on Friday afternoon, we had enough water to float a smallish boat, which was enough.  Butch expertly picked her up off the trailer and set her down in the water.


Those slings may be ancient, but they will hold this vessel.
Going down with the ship.  My first ride.
Splash.

Leaks  were minimal, and none were in areas where epoxy was used.  I had a small drip around the centerboard case top, which was bolted in place.  A few quick turns with a wrench on the nuts solved this.  There was also a minor drip around one keel bolt, which we decided to leave alone, and let the swelling of the keel resolve it.  Aside from that, the only glitch was that the starboard bilge pump didn't work.  A wire must have come loose. While this could have been a problem, there wasn't enough water in the bilges to pump anyway. No harm; no foul.
Tied up for the night at Butch's.  Look at that waterline!
Friday was another night of anxiety and dark thoughts for me, contemplating all the things that could go wring with a new, untested, amateur built boat on the Delaware River.  But morning came, and I felt much more assured because Jeff had agreed to come along on the voyage.  In addition to being a first rate boat builder, a master engineer, a highly skilled rigger, and a generally great guy, he also knows the Delaware, having crewed on sailing ships for many years in many places.

Slack tide was at noon, and we wanted to hit it for two reasons.  First, it would give us a plenty of time to reach the Museum dock at Penn's Landing on the rising tide, and second because Butch's is located on a fairly narrow stretch where Little Tinicum Island divides the Delaware. Consequently, once the tide gets moving, the water fairly roars past Butch's, making departure for a small low-powered and untested sailboat-to-be a bigger challenge than we wanted.  Adding to this was a 20 knot breeze from the SSW that promised to "help" us leave Butch's.

We departed at 11:50 Saturday morning, with me at the helm (obviously for the first time.) On board were Jeff, who was navigating us through the swift and bar filled area, my boatshop buddy John, and my wife Joan. It had turned out that I was the only non-"J" person on board, but then again I was the captain.


Jeff on the foredeck guides us out of Butch's and into the current.
The engine proved more than adequate and we made it out of the marina with no difficulty at all, even with a rank amateur at the helm. We had a pretty good following sea for much of the 3 hour journey, due mostly to the stiff breeze, I assume. Still, Lagniappe ran true, didn't get pushed around, and was very sensitive to the helm. She really showed the virtue of a double ender and that huge rudder.  We made good speed, and the Yanmar 1GM with a 13 inch wheel seemed to move us along nicely, but it is hard to tell, given that we were moving with the tide nearly the entire trip.


I know that bouy is out there somewhere.
John pops out of the forward hatch as we approach the Walt Whitman Bridge.
A big phase of this project is over now. I am both amazed and amused at how well it has turned out.  As a retired systems guy, and an instinctive pessimist, I always expect that if something new can fail, it will. Nevertheless, Lagniappe has passed her "sea trials" with flying colors.  I am impressed anew with Iain Oughtred's design, which is not only beautiful in the water, but agile on it. I am proud with my accomplishment, and, most of all, exceedingly grateful to the people who helped, guided, and supported me over this multi-year adventure. Foremost among them are my wife, Joan, who put up with this insanity, Jeff Huffenberger, who has been my guide and advisor along the way, and John Brady, President of the Independence Seaport Museum, and Newt Kirkland, professional boatbuilder and curmudgeon, who taught me most of what I know about building wooden boats. The continuing help, good will, and good natured ribbing from the staff and volunteers at the Workshop on the Water at the Independence Seaport Museum has made the hard work in the recent push to the water great fun.

I'm taking the weekend off, but Monday, the mast gets stepped as we begin phase 2.


Friday, March 14, 2014

Splash Day Approaches

We are getting really, really close now.  With a bit of luck, Lagniappe will be leaving the comfort of the shop in a week or two and face the cold hard reality of spring on the Delaware River.  The current plan is to move her out of the shop and back onto the trailer on Friday, March 21. Then, we will test fire the engine, and if all goes well tow her to a nearby boatyard for launching into the river.  Then, it will be back down stream to the docks at the Independence Seaport Museum for rigging.

There is not much left to do on the boat aside from lots of varnishing and the rigging.  House electrics are done (bilge pumps, running lights, anchor light, and engine) Every nut, bolt, clamp, through hull fitting, and cotter pin has been double checked and tightened. The bottom paint has been touched up where needed.  

The cockpit sole is completed.  I have a 5 inch high engine box.  I could have gone a couple of inches lower, but this will leave space for noise insulation, and the box can double as a table for all those alfresco dining opportunities fast approaching. Also, I am thinking that a 5 inch box will be harder to miss when moving around the cockpit and thus less likely to lead to a twisted ankle. We shall see.


My first mate (seated) and my boatshop buddy John share a quiet moment.
Hatch covers and engine box have just been painted.
I played "gotcha" with the State bureaucracy for the past couple of weeks in an attempt to get legal.  In New Jersey (and I guess in many other political entities) boats need to be registered if the boat is longer than 12 feet.  This entitles the owner to pay the state a registration fee.  The requirements for registration of a "homemade" boat are challenging.  One must do the following:


  • Present a completed registration form (Form number OS/SS-27) to the Division of Motor Vehicles. 
  • Provide the originals of all receipts for all purchased parts. My particular pile of receipts is about 2 1/2 inches tall. The purpose of this requirement is to enable the government to collect sales tax on any items purchased out of state, hence not taxed by New Jersey.
  • Prepare a statement describing all construction details.  This must be notarized by a licensed Nortary Public. The Notary doesn't have to attest to the accuracy of the statement; just the fact that the applicant (me) said that it was correct.  Hmmmm. 
  • Take photographs of "all four sides" of the boat, plus all deck areas, and all cabins.  I know port and starboard, but I am still searching for the other two sides -- an especially challenging enterprise on a double ender like the Grey Seal. Nevertheless, I provided a whole bunch of pictures, so they were able to decide what constituted sides 3 and 4.
  • Show the boat to the New Jersey Marine Police so they can complete form number ISM/SS-10A, the "Hull Identification Number (H.I.N.) Investigation Report" attesting to the fact that the hull does not have a hull number because it is a homemade boat.
  • At that point, I was able to go back to the Motor Vehicle Agency.  They looked at my pictures, photocopied my receipts, calculated the sales tax I "owed," took my form OS/SS-27 and the form ISM/SS-10A, plus one new form, for good measure, accepted my $68 registration fee, and granted me their blessing to sail my boat upon the waters of New Jersey.
The Marine Police, by the way,were great. They stopped by the boatshop one afternoon (their station is across the Delaware, and a few miles north of the Museum,) looked at Lagniappe; we talked boats for a little while; they gave me the completed Form number ISM/SS-10, confirming that the vessel is indeed home build and hence does not have a hull number, and wished me luck with the rest of the process. I went back to varnishing.

Now that I am registered and titled, I needed to make boards on which to affix my numbers and my registration stickers.  That was an easy job with a few scraps of plywood, epoxy, and white hull paint.  One more coat and I'll apply the stick-on black numbers.

Number boards painted and drying.

Speaking of boards, I fastened my name boards.  I found that they didn't look that great on the sheer strake, near the stern.  A transom is the place for a name board, I think.  Jeff happened by and suggested the sides of the house, where (very cleverly) I had left exactly the right amount of space between the porthole and the running light.  The boards fit in perfectly, and I think they add a touch of class to the whole project.

Nameboards are now fastened.

My stays arrived yesterday.  I ordered them with an eye rolled onto the lower ends and a few extra feet of wire rope at the top.  I will do a crimp once I have the precise measurement.  While I am partial to bronze fittings, the wire rope is 7x19 stainless wire, so I went with stainless eyes as well.

My new shrouds and forestay waiting for rigging day.
There is no such thing as a "last" coat of varnish on a boat, but, for now at least, I think my tiller has about enough to last the season.  I put one more coat on for good measure, and it is drying, waiting for launch day.

A very shiny tiller.  The knob, by the way, is African Blackwood.


Sunday, February 23, 2014

Getting there

Snow, snow, and more snow.  That has been winter for us so far.  Fortunately for me, Lagniappe is still warm and happy in her spot in the Workshop on the Water at the Independence Seaport Museum.  For this I am extremely grateful.  Although  I have lost a few days due to weather related closures, I have pretty much completed all the tasks I set out to do this winter while in the shop.  Therefore, it won't be long before we move her again.  This time, the move will be into the water, I hope.


Bosco Brown checks out the latest snowfall in the back yard.
The engine installation has been occupying most of my time. With occasional valuable consultation offered by Jeff Huffenberger, the head of the Workshop, tasks have gone pretty smoothly.  The engine is now connected to raw water, fuel, prop shaft, and exhaust.  It is bolted to the bearers, and even connected to the battery.  In other words, it is fully INSTALLED!

I ordered a 7/8 inch stainless shaft from Tim at Down Jersey Marine, in Greenwich, New Jersey, and picked it up a couple of weeks ago -- between snow storms.  Tim, who provided my rebuilt Yanmar 1GM early last year, had the shaft carefully fitted to the coupling, and even dimpled for the set screws. He milled the end of the coupling for a perfectly square fit to the engine.

I decided to use a "newfangled" stuffing-less stuffing box made by PYI, Inc. It only cost a bit more than the conventional ones, and has the advantage of being drip-free and needing virtually no adjustment once in place.  It consists of a finely milled graphite ring that bears against a finely milled smooth stainless bearing attached to the shaft. It is lubricated by water that flows past the stern bearing and into the shaft tube.  
PYI Packless shaft seal (PSS) set in place on shaft.
The stainless collar gets tightened on the shaft. Rubber O-rings keep it sealed.

PSS fully assembled, shaft and coupling locked in.  Waterlock exhaust at bottom of photo.

Once the engine and shaft were set, I turned my attention to final rudder installation.  I had a bit of trouble with the lower pintle and gudgeon, which absolutely did not fit as they were supposed to.  When positioned on the deadwood, at the required angle, the gudgeon could not be fastened. It's arms were nearly parallel to the edge of the deadwood.  Finally, I reversed the pintle and gudgeon, mounting the pintle upside down onto the deadwood, and the gudgeon upside down onto the rudder.  That worked out fine, but I was very disappointed that the extremely expensive "custom" casting for Oughtred's Grey Seal made by Classic Marine in the UK was not what Iain's plan called for at all.  If duty and shipping were not so high, I probably would have sent the pieces back. In the end, the setup worked OK, but I could have had an "off the shelf" set that worked just as well for a much, much cheaper price.


Upside down and reversed pintle and gudgeon in place.
I fastened the pintle and gudgeon with bronze bolts and nuts bedded in 3M 5200, and painted the whole thing with bottom paint.


Just a bit more rudder trimming, and my prop will spin freely

Rudder fully mounted and painted.

I began a bit of wiring by installing my bronze running lights and wiring up the bilge pumps. A 6 circuit switch panel with fuses is mounted to a mahogany chase attached the forward side of the aft cabin bulkhead on the starboard side.  That way, I can hide all the wires from view by running them down and either forward or aft below the cockpit sole or cabin sole, as needed.

Wiring chase glued to bulkhead

I installed the de-chromed port and starboard running lights into the cabin sides slightly forward of the center.  They look pretty nice.  I will run the wiring as inconspicuously as possible under the side decks and back to the switch panel.  Later, I will wire the masthead mounted aft running light to the same switch.


Starboard running light
Now that the engine is finished, I can begin to close in the cockpit sole.  I plan to have two removable sections down the middle of the sole, for and aft of the engine hatch, so I can get access to batteries, shaft, etc.  Additionally, I will have a removable raised (about 4 1/2 inches) engine box.  I framed with 1 1/2 by 2 inch ash beams, half lapped and glued to adjoining beams.  Next, I will install the remaining plywood and paint the sole.
Ash framing is in place. Aft cross piece will be screwed in place so engine can be removed.